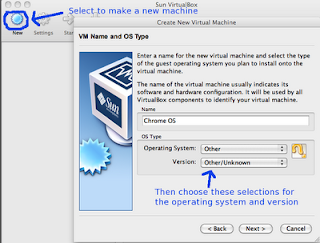
1. Make a New Machine

Update: It looks like the network connection won't work in Chrome OS for some people if they choose "Other" for their OS. We found out (through the discussion in the comments) that picking "Linux" as the operating system and "Linux 2.6" as the version might work better for some host PCs.
2. Select the amount of RAM for you Chrome OS virtual machine

Next you select the amount of RAM to dedicate to your Chrome OS virtual instance. I selected 542 MB of RAM as this should be plenty for Chrome OS and not push my test machine (2 GB of RAM total) to the limit. You would choose the amount of RAM you think is appropriate here.
3. Select the Chrome OS disk image

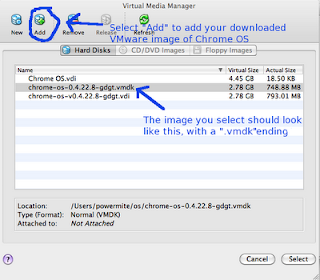
Next is the hard disk image selection. Select "Use existing hard disk" and click the small folder icon next to the text field to browse for the Chrome OS .vmdk image you downloaded. You will need to add a new disk image by selecting "New" in the top left corner and then browse to where your Chrome OS image was downloaded.
Continue after the break for the rest of the guide.
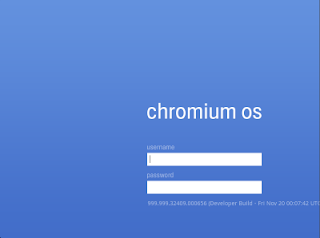
Next, VirtualBox simply asks you if you really want to make the Chrome OS machine. You probably do, so just select finish. Now you are ready to start your machine and see Chrome OS running for the first time! Simply push "Start" when your machine is highlighted and Chrome OS should boot up (quite quickly, too!). As an aside, I increased my video memory for Chrome OS to 60 MB (the default for an unknown machine is 5 MB). This may not be necessary, but you can do so under the settings for your machine.
If you can't get the network to work on your Chrome OS virtual machine, try logging in with the username "chronos". It has no password and many people have reported that it fixes the network problem.

Check out the comments for some troubleshooting if you are having a hard time. Or just leave a comment if you can help or have an opinion on Chrome OS!

No comments:
Post a Comment