How to find the IP address of the sender in Gmail
When you receive an email, you receive more than just the message. The email comes with headers that carry important information that can tell where the email was sent from and possibly who sent it. For that, you would need to find the IP address of the sender. The tutorial below can help you find the IP address of the sender. Note that this will not work if the sender uses anonymous proxy servers.
Finding IP address in Gmail:
1.Log into your Gmail account with your username and password.
2. Open the mail.
3. To display the headers,* Click on More options corresponding to that thread. You should get a bunch of links.* Click on Show original.
4. You should get headers like this:Gmail headers : nameLook for Received: from followed by a few hostnames and an IP address between square brackets. In this case, it is65.119.112.245.That is be the IP address of the sender!
5. Track the IP address of the sender.
Monday, August 30, 2010
How to find the IP address of the sender in Hotmail
When you receive an email, you receive more than just the message. The email comes with headers that carry important information that can tell where the email was sent from and possibly who sent it. For that, you would need to find the IP address of the sender. The tutorial below can help you find the IP address of the sender. Note that this will not work if the sender uses anonymous proxy servers.
Finding IP address in Hotmail
1. Log into your Hotmail account with your username and password.
2. Click on the Mail tab on the top.
3. Open the mail.
4. If you do not see the headers above the mail message, your headers are not displayed. To display the headers,
* Click on Options on the top-right corner
* In the Mail Options page, click on Mail Display Settings
* In Message Headers, make sure Advanced option is checked
* Click on Ok button
* Go back to the mails and open that mail.
5. If you find a header with X-Originating-IP: followed by an IP address, that is the sender's IP addressHotmail headers : name ,In this case the IP address of the sender is [68.34.60.59]. Jump to step 9.
6. If you find a header with Received: from followed by a Gmail proxy like thisHotmail headers : nameLook for Received: from followed by IP address within square brackets[].In this case, the IP address of the sender is [69.140.7.58]. Jump to step 9.
7. Or else if you have headers like thisHotmail headers : nameLook for Received: from followed by IP address within square brackets[].In this case, the IP address of the sender is [61.83.145.129] (Spam mail). Jump to step 9.
8. * If you have multiple Received: from headers, eliminate the ones that have proxy.anyknownserver.com.
9. Track the IP address of the sender
How to find the IP address of the sender in Yahoo! mail
When you receive an email, you receive more than just the message. The email comes with headers that carry important information that can tell where the email was sent from and possibly who sent it. For that, you would need to find the IP address of the sender. The tutorial below can help you find the IP address of the sender. Note that this will not work if the sender uses anonymous proxy servers.
Finding IP address in Yahoo! Mail
1. Log into your Yahoo! mail with your username and password.
2. Click on Inbox or whichever folder you have stored your mail.
3. Open the mail.
4. If you do not see the headers above the mail message, your headers are not displayed. To display the headers,
* Click on Options on the top-right corner
* In the Mail Options page, click on General Preferences
* Scroll down to Messages where you have the Headers option
* Make sure that Show all headers on incoming messages is selected
* Click on the Save button
* Go back to the mails and open that mail.
5. You should see similar headers like this:Yahoo! headers : nameLook for Received: from followed by the IP address between square brackets [ ]. Here, it is 202.65.138.109.That is be the IP address of the sender!
6. Track the IP address of the sender
Recover the lost administrators password in Windows XP
Slightly more work needed if you lose or forget the Windows XP administrator password.
1.First reboot Windows XP in safe mode by re-starting the computer and pressing F8 repeated as the computer starts up.
2.Then (in safe mode) click Start and then click Run. In the open box type "control userpasswords2" without the quotes - I have just used quotes to differentiate what you have to type.
3.You will now have access to all the user accounts, including the administrators account and will be able to reset the lost password.
4.Just click the administrators user account, and then click Reset Password.
5.You will need to add a new password in the New password and the Confirm new password boxes, and confirm by clicking OK.
Keeping the Windows XP Core in the RAM
f you have 512 MB or more of RAM, you can increase system performance by having the Windows XP 'Core' kept in the RAM instead of paged on the hard disk.
Go to Start -> Run - Type regedit and press enter - On the left hand side tree, navigate to
HKEY_LOCAL_MACHINE\SYSTEM\CurrentControlSet\Control\Session Manager\Memory Management\
- On the list on the right side, look for an entry called 'DisablePagingExecutive'
- Double click it
- Press 1 on your keyboard
- Click OK
- Exit regedit and reboot the computer
To revert to the default setting, follow the same steps as above, but this time, press 0(zero) instead of 1 on the keyboard.
Remove Thumb.db file
Thumb.db is is a cache of the current picture in that directory.to remove it go for following
step1 > open "WINDOWS EXPLORER".
2>go to "TOOLS".
3>open "FOLDER OPTIONS".
4>go to "VIEW".
5>see 1st section "FILES & FOLDERS".
6>click on the "DO NOT CACHE THUMBNAILS".
now the thumbnail file will be removed from ur computer once u do this the file will be never created.
Error Reporting in XP
If error reporting in XP is bugging you then turn it off.
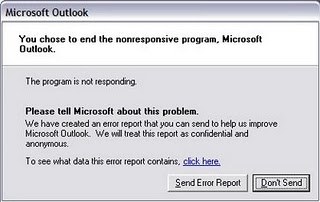
When a system error occurs in XP, a little dialog box appears asking if you want to report the error to Microsoft. Click the message box to make it disappear. You don't have to report the error if you don't want to and on today's "Call for Help" Leo shows you how to turn off the feature if you find it distracting.
To disable error reporting, follow these directions:
1. Right-click My Computer and choose Properties.
2. Click the Advanced tab on your System Properties dialog box.
3. Click the Error Reporting button on the Advanced tab.
4. Place a checkmark next to "Disable error reporting."
5. Leave the other radio button unchecked next to the text labeled, "But notify me when critical errors occur."
6. Click OK.
Secret Codes for Nokia
Codes :
1) *#06# For checking IMEI(international Mobile Equipment Identity)
2) *#7780# Reset to factory settings
3) *#0000# To view software version
4) *#2820# Bluetooth device address
5) *#746025625# Sim clock allowed status
6) #pw+1234567890+1# Shows if ur sim as any restrictions
1) *#06# For checking IMEI(international Mobile Equipment Identity)
2) *#7780# Reset to factory settings
3) *#0000# To view software version
4) *#2820# Bluetooth device address
5) *#746025625# Sim clock allowed status
6) #pw+1234567890+1# Shows if ur sim as any restrictions
Tips to recover scratched CD's
1. Spread a cloth on a flat surface and place the CD on it.
2. Then, hold the disc with one hand, use the other to wipe the polish into the affected area with a soft cloth.
3. Wait for it to dry and buff using short, brisk strokes along the scratch, not across it.
4. A cloth sold to wipe spectacles or camera lenses will work super m8's.
5. When you can no longersee the scratch,, wash the disc with water and let it dry before playing. Intersting isnt it? Try it right now
I have used toothpaste with good effects before Ive also used car paint cutting compound on deeper scratches. It does leave lots of smaller scratches (as it is a cutting compound after all) but it will remove the worst scratches in most cases.
ya u r gng to b surely befinited by this Operation
* Fingermarks/prints cause 43% of disc problems!
* General wear & tear causes 25% of disc problems!
* Player-related issues cause 15% of disc problems!
* Remaining Others
Add Your Name (or) Application to right click Of My Computer
Caution ..
As it is related to Windows regisrty it can be dangerous
so,Try This at ur own risk
To write your name on right click application
please follow the steps.
1.Copy/Paste the following code in Notepad And then Save it as .reg
Windows Registry Editor Version 5.00
[HKEY_CLASSES_ROOT\CLSID\{20D04FE0-3AEA-1069-A2D8-08002B30309D}\shell\Registry Editor]
@="Your Name Or Name of the Application"
[HKEY_CLASSES_ROOT\CLSID\{20D04FE0-3AEA-1069-A2D8-08002B30309D}\shell\Registry Editor\command]
@="Location Of The Application"
2.Now edit it and then Type your name In
Eg:
[HKEY_CLASSES_ROOT\CLSID\{20D04FE0-3AEA-1069-A2D8-08002B30309D}\shell\Registry Editor]
@="Rajesh"
3. If u want to get any application, once you click Your name or name of application
Then , Type the location Of the application Which u want to open In:
[HKEY_CLASSES_ROOT\CLSID\{20D04FE0-3AEA-1069-A2D8-08002B30309D}\shell\Registry Editor\command]
@="Location Of The Application"
For eg.C:\Program Files\Yahoo!\Messenger\messenger.exe
Thats It finally save it And then Run it .
------------------------------------------------------------
To add Application Control Panel
[HKEY_LOCAL_MACHINE\SOFTWARE\Classes\CLSID\{20D04FE0-3AEA-1069-A2D8-08002B30309D}\shell\Control Panel\command]
@="rundll32.exe shell32.dll,Control_RunDLL"
To add Application Add/Remove
[HKEY_CLASSES_ROOT\CLSID\{20D04FE0-3AEA-1069-A2D8-08002B30309D}\shell\Add/Remove\command]
@="control appwiz.cpl"
To add Application Reboot
[HKEY_CLASSES_ROOT\CLSID\{20D04FE0-3AEA-1069-A2D8-08002B30309D}\shell\[Reboot]\command]
@="shutdown -r -f -t 5"
To add Application Shutdown
[HKEY_CLASSES_ROOT\CLSID\{20D04FE0-3AEA-1069-A2D8-08002B30309D}\shell\[Shutdown]\command]
@="shutdown -s -f -t 5"
How to "Delete administrator Password" without any software
Method 1
Boot up with DOS and delete the sam.exe and sam.log files from Windows\system32\config in your hard drive. Now when you boot up in NT the password on your built-in administrator account which will be blank (i.e No password). This solution works only if your hard drive is FAT kind.
Method 2
Step 1. Put your hard disk of your computer in any other pc .
Step 2. Boot that computer and use your hard disk as a secondary hard disk (D'nt boot as primary hard disk ).
Step 3. Then open that drive in which the victim’s window(or your window) is installed.
Step 4. Go to location windows->system32->config
Step 5. And delete SAM.exe and SAM.log
Step 6. Now remove hard disk and put in your computer.
Step 7. And boot your computer :-)
Subscribe to:
Posts (Atom)
How to Put Google Adsense Below Post Title in Blogger?
Adsense is used by majority of expert bloggers for their website monetization because it is a cookie based contextual advertising syste...

-
Adsense is used by majority of expert bloggers for their website monetization because it is a cookie based contextual advertising syste...
-
Portable Micro XP 0.82[Launch from USB stick in side Windows] Image - img187. imageshack. us/img187/666/xpusbstckku2. jpg Descriptio...
-
Change the Default Directory of Software Installation You may want to change the location of your system default folder (C:\Program Files) f...
